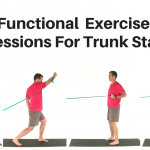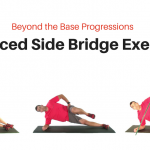
 The curl up exercise is another staple of lower back rehab. It is part of what Professor McGill, a world authority on spine biomechanics from the University of Waterloo, refers to as the “big three” – a set of three exercises he recommends in the early stages of low back rehabilitation. (FYI, the other exercises in the big three include the Side Bridge and Bird-Dog exercises.)
One key reason the Curl Up is highly advantageous in back pain rehab relates to it’s favorable ratio of muscle activation to spine load. As discussed by McGill in his classic text, the architecture of the trunk muscles is such that muscle contraction is also associated with spine compression (1). More muscle contraction creates greater compression.
Under normal circumstances this compression can help to stabilize the lower back. However, with an injured spine this compression can create further damage and impede healing. This needs to be considered when prescribing exercises for the low back pain patient. Especially in the early stages of acute low back pain.
McGill’s recommendation of the “big three” is largely based on the fact that the included exercises tend to isolate certain muscles (or are at least biased towards certain muscles or muscle groups). For example, EMG profiles of the curl up demonstrate strong activation of the rectus abdominus in conjunction with low EMG activity of the internal and external oblique, transverse abdominus, and psoas muscles. So the curl up can be considered primarily a rectus abdominus exercise. This relative isolation allows an adequate training effect on the rectus abdomius while minimizing the overall spine compression.
The Curl Up Exercise Progression
Like most spine stability exercises, form is critical to success. And there are a few key things to keep in mind with the curl-up exercise. First, the lumbar spine must be kept in a neutral position for the entire exercise. Remember, the basic goal of trunk stability is to train the muscles to hold the lower back stable. We want to use a more isometric contraction to train the abdominals (in this case the rectus abdominus) to minimize spine motion and resist movement.
It should be noted that this is different than traditional curl-up exercises that focus on flattening or pressing the lumbar spine into the floor. This flattening of the lower back creates lumbar flexion which is undesirable in most patients.
To keep the neutral lumbar spine posture the patient should focus on lifting the upper body from the thoracic spine. They need to think about lifting the head and shoulders towards the ceiling, not curling the trunk forward.
To ensure the lumbar spine remains in a neutral alignment the hands should be placed flat on the floor under the lower back. Contrary to popular belief, this hand placement is not meant to prevent the flattening of the lower back. The hands are to act as sensors for the patient to monitor lumbar position. As a form of feedback to confirm to the patient they are doing the exercise the right way. When done correctly the pressure should not increase under the hands as the trunk is lifted.
Adding An Abdominal Brace
To further stimulate the trunk stabilizers an abdominal brace can also be worked into the curl-up exercise. Although in acute cases this may not be able to be done right away. But as stated above, as more muscles are active spine compression increase. So with more acute cases, and especially if there is pain when combining the abdominal brace to the curl up, the patient may need to perform the abdominal brace and curl-up as separate exercises. These exercises can be combined as the condition improves.
Don’t Overload the Neck
As a side note, some patients will have a tendency to flex the neck or jut the chin forward as they lift off the floor. To prevent this the focus needs to be on tucking the chin gently towards the neck at the beginning of the exercise (this is a standard head retraction position). Then as they lift they should visualize the upper body (head, neck, upper back) lifting as a single, rigid unit.
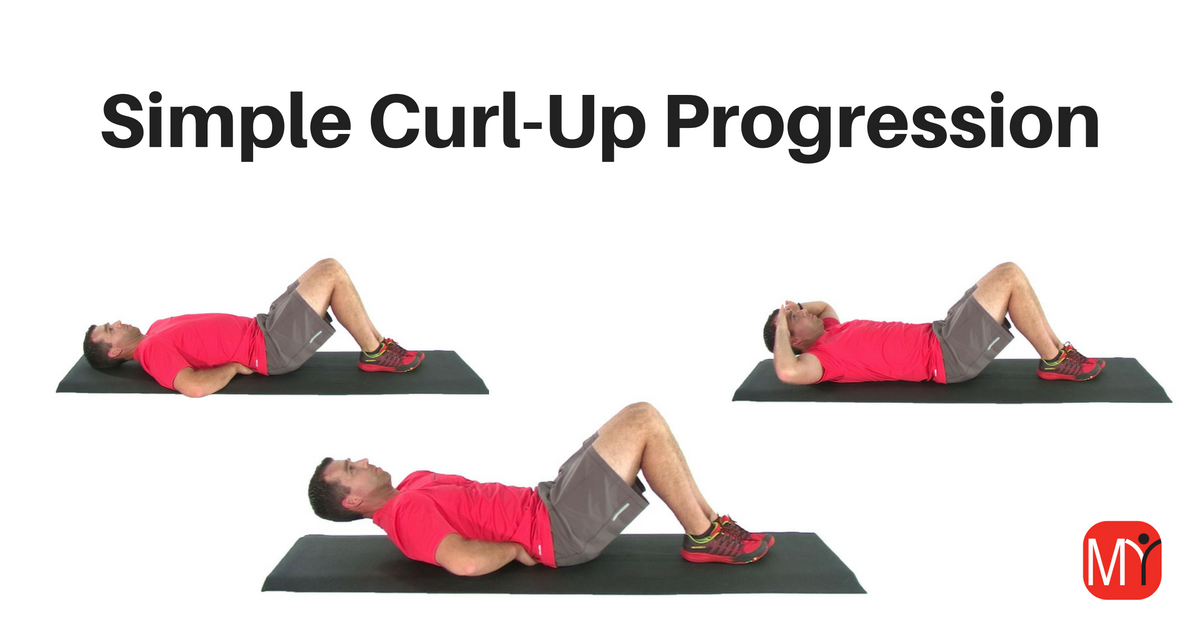
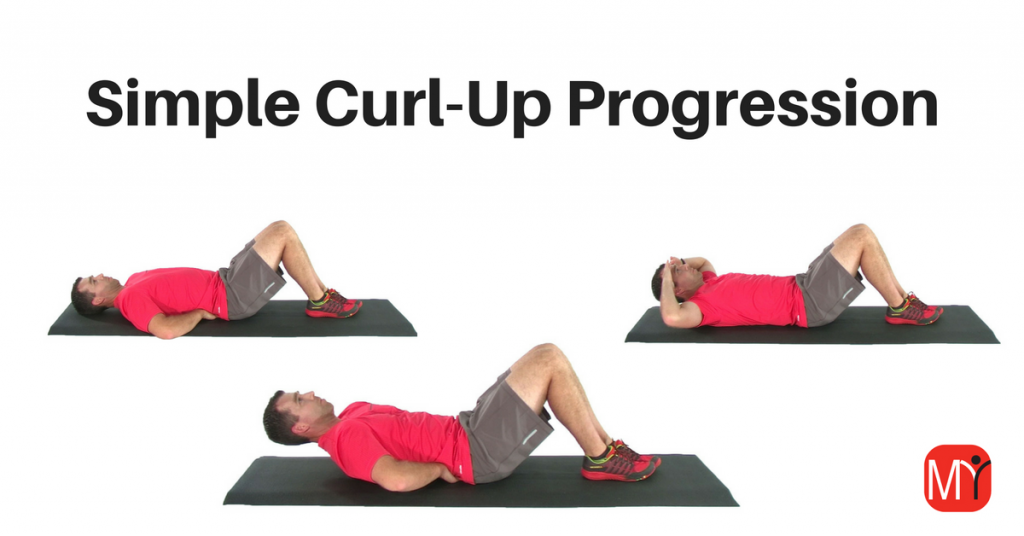
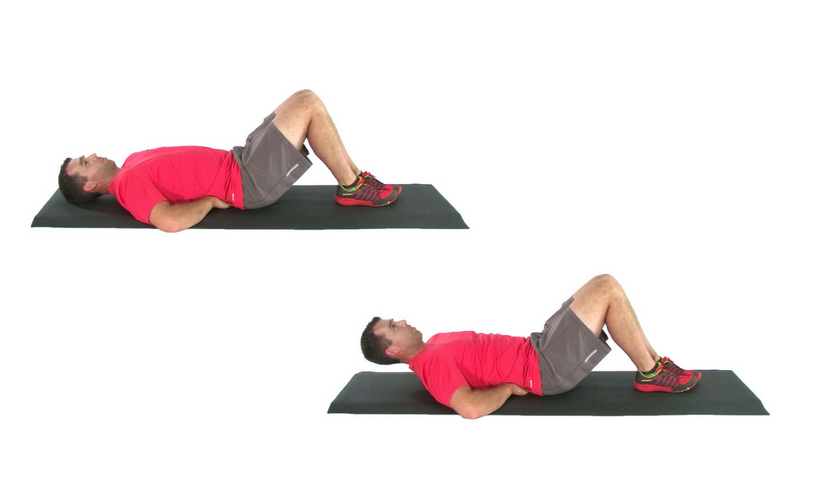
Basic Curl Up Exercise
The Basic Curl Up exercise is the starting point in the Curl-Up progression. With this basic progression the arms will stay resting flat on the floor to add some additional support and assistance to the abdominal muscles.
With this basic exercise start by holding the contraction for a few seconds. As strength improves progress to 10 second holds to build more endurance. Significantly deconditioned patients who have trouble with even this basic exercise can begin with lifting just enough to take some of the weight off the head and shoulders.
Here’s how to perform the exercise:
- Begin lying on your back with your knees bent and feet flat on the floor. Place your arms flat on the floor with your hands underneath the small of your back with your elbows resting on the floor
- Tuck your chin towards the neck and brace your abdominal muscles.
- Now lift your head and shoulders up towards the ceiling. As you lift you should feel your abdominal muscles contract but your lower back should not push into your hands.
- Hold the head and shoulders up for 2-3 seconds, then slowly lower back to the floor and relax your muscles.
- Perform 2-3 sets of 10 repetitions 1x/day.
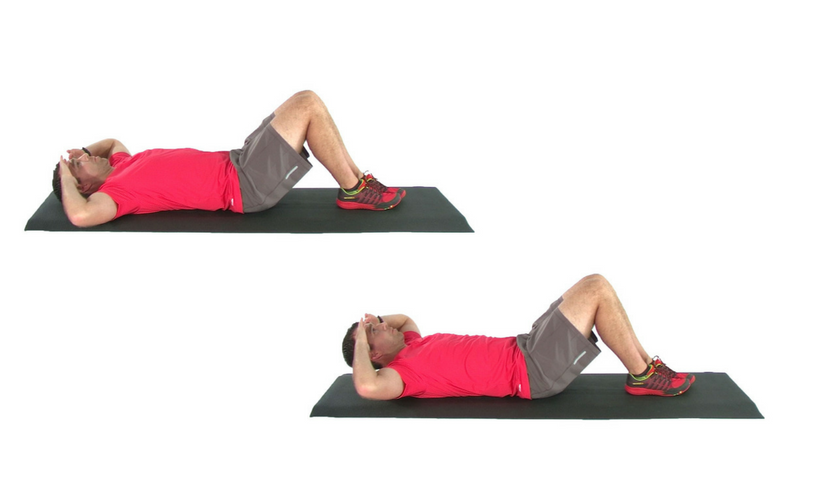
Intermediate Curl-Up Exercise
With the Intermediate Curl Up exercise the hands remain positioned underneath the lower back, but now the elbows are raised off the floor. This prevents the arms from assisting in lifting the trunk, thus creating more load to the rectus abdominus and abdominal wall. There should be no issue with including abdominal bracing at this point in the progression.
Here’s how to perform the Intermediate Curl Up exercise:
- Begin lying on your back with your knees bent and feet flat on the floor. Place your arms flat on the floor with your hands underneath the small of your back with your elbows resting on the floor
- Tuck your chin towards your neck and lift your elbows off the floor. Then perform an abdominal brace.
- Now lift your head and shoulders up towards the ceiling. As you lift you should feel your abdominal muscles contract but your lower back should not push into your hands.
- Hold the head and shoulders up for for 10 seconds, then slowly lower back to the floor and relax your muscles.
- Perform 2-3 sets of 10 repetitions 1x/day.

Advanced Curl Up
With the Advanced Curl Up the hands are moved from under the back to the forehead. This creates more demand on the abdominals by redistributing the weight of the arms further away from the lower back. There is now greater resistance to lifting the head and shoulders. You could make this even more challenging by positioning the arms straight overhead, but this version is sufficient for the most back pain patients.
Here’s how to do it:
- Begin lying on your back with your knees bent and feet flat on the floor with your hands resting on your forehead.
- Tuck your chin towards your neck and brace your abdominal muscles.
- Now lift your head and shoulders up towards the ceiling. As you lift you should feel your abdominal muscles contract but your lower back should not push into your hands.
- Hold the head and shoulders up for 10 seconds, then slowly lower back to the floor and relax your muscles.
- Perform 2-3 sets of 10 repetitions 1x/day.

References
- McGill, S. Low Back Disorders. 2002. Human Kinetics.