When dealing with a painful or dysfunctional hip movement and exercise is a critical part of the treatment and recovery process. But we are of course going to need to use and prescribe different exercises for different purposes.
For example, we may need to prescribe some exercises to improve flexibility of the hip, or we may need other exercises to build strength or endurance, and still other exercises to target joint control or stability.
But there’s an order we need to follow.
I think of this as a sort of treatment or movement hierarchy. We need to do certain things before other things to make sure we arrive at the desired results.
With respect to musculoskeletal pain and injury, the treatment and movement hierarchy goes like this:
1.Build Movement Tolerance
First, we need to build movement tolerance: This is the first and most fundamental step. The idea here is that we’re trying to restore tolerance to basic, fundamental joint motion.
Think of it this way, if the body can’t perform basic joint motions without hurting we’re going to have a major problem.
If we take the hip for example, if a hip can’t flex, extend, abduct, adduct, and rotate without pain that hip is either going to hurt all day, or the body will be forced to compensate and find alternate movement patterns to get around the painful movements and positions.
So with these patients – who I classify as being “movement sensitive” – we’re going to prescribe exercises aimed at reducing pain, to guide healing, and to regain tolerance to basic hip motions.
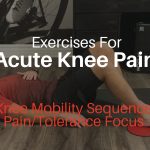
These types of exercises are not the focus of this article. But I have reviewed the basic movement sequence for acute hip pain in a previous article.
2.Build / Restore Joint Mobility and Control
As soon as motion is tolerated we need to shift our focus towards restoring full function of the hip. It’s these exercises we’re going to discuss and review here.
Now I should point out here that when I say that motion is no longer limited by pain I don’t mean that the hip itself is not painful or that the patient is no longer experiencing symptoms. I mean that symptoms do not limit hip motion during our motion testing or with the exercises we’re prescribing to the patient.
So, as motion is tolerated we can start to increase the ROM and intensity of the exercises to start to restore overall hip function.
The way we need to think of this part of the hierarchy is that if we want to restore normal hip function there are just certain, basic, fundamental things a hip needs to be able to do – for example, as we just said, a normal hip needs to be able to flex, extend, abduct, adduct, and rotate. If these motions are limited, the hip isn’t going to work right.
Again, this is similar to what we discussed a moment ago when talking about a movement sensitive hip, but in that context motion was limited due to pain.
The limitations we’re talking about here are not because of pain, but are more the result of mechanical or neurological compromise. Because of compromise or dysfunction of joint flexibility and/or muscle-motor control.
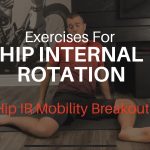
4 Essential Exercises For Hip Mobility and Control
So in this article I’m going to go over the basic movement sequence/movement routine that I use when dealing with hip pain patients.
Now an important point here is that we’re going to use similar motions that we used for our hip pain/tolerance routine. But we’re going to change how we’re doing these exercises.
The key shift here is we’re increasing the ROM and intensity of muscle contraction/effort we’re using. Again, to put this into context, when we were dealing with an acute hip or hip in which motion was limited but pain, the goal was to move to tolerance. So the ROM was limited as needed.
There we were using active motion to “clear the range” But as soon as the patient’s sx improve and pain doesn’t limit motion we can start to work into the end range positions.
The goal is to push-into the end-range positions, which will not only act to improve joint mobility, but it also increases muscle tension and challenges muscle control. We are essentially using the end-range resistance to push- against, to create more tension and a firmer isometric contraction of the muscle.
So what I’m going to do first is go over the exercises themselves. Then we’ll review the programming and progression criteria.
Make Exercise Prescription Easier With My Rehab Connection
As one last FYI , if you’re a My Rehab Connection subscriber and use our exercise software, you can find all of these exercises in our Exercise Library. You can search for each exercise by name in the Exercise Library itself, or you can find this sequence in the Exercise Groups section under the title, Basic Hip Movement Sequence: Control/Mobility Focus.
The Exercises.

Supine Hip Rotation AROM/Mobilization
Begin lying on your back with your legs fully extended. Slowly rotate your hips/legs outward.
Tense and firmly contract the muscles as if you are pushing into the end of the motion/ Hold this firm contraction (end range squeeze) for 1-2 seconds then rotate inwards.
Hold inward tension/contraction for 1-2 seconds then rotate outwards again.
Perform this back and forth motion 10 times. Repeat 2x/day.

Supine Hip Abduction-Adduction AROM/Mobilization
Begin lying on your back with your leg fully extended and the opposite knee bend with the foot flat on the floor.
Slowly slide your foot/leg out to the side. Focus on moving from your hip, as if you are pulling your leg up to your side using the muscles on the outside of your hip.
Hold the leg outward for 1-2 seconds then slide your foot/leg inward.
Tense and firmly contract the muscles as if you are pushing into the end of the motions.
Perform this back and forth motion 10 times. Repeat 2xx/day.

Quadruped Hip Rotation AROM/Mobilization
Begin on your hands and knees with your thighs vertical and your knees directly under your hips.
Keeping the knee planted on the floor, turn your foot and lower leg in under your body. (NOTE – you will need to bend the knee to lift the foor over the opposite leg to allow the motion to occur.) Try to move just your thigh – do now allow your back or pelvis to twist. Focus on feeling the motion occur form your hip joint.
Hold for 1-2 seconds then turn your thigh so your foot/lower leg rotates out away from your body.
Move as far as you can. Focus on tensing/firmly contracting the muscles as you get to the end of the motions.
Perform this back and forth motion 10 times. Repeat 2x/day.

Quadruped Hip Flexion-Extension AROM/Mobilization
Begin on your hands and knees. Now pull your knee/thigh up towards your chest. Try to keep your lower back stable. Focus on pulling your leg up using the deep muscles on the front of your hip.
Hold the leg up for 1-2 seconds then slowly pull your leg back behind your body.
Move as far as you can. Focus on tensing/squeezing the muscles at the end of each motion.
Do not allow your lower back to arch.Focus on pulling your leg back using the muscles on the back of your hip.
Perform this back and forth motion 10 times. Repeat 2x/day.
Programming And Progression Criteria
Patient Instructions:
Now that we’ve gone over the program itself, let’s go over programming and progression criteria
First, the key with these motions is to push into the end range. I refer to this as an end range squeeze. This concept here is that we’re using the end of the joint range to push against, which allows us to contract harder. We’re essentially creating a firmer isometric contraction at the end of the motion.
But just to reiterate, this is assuming the motion is tolerated. Remember, especially when first transitioning from a pain/tolerance phase to a control/mobility phase we need to ensure that motion does note create pain and generates the appropriate feeling and sensation for the patient. If this isn’t the case you may need to consider regressing back to a pain/tolerance focus for another week or two.
Patient Education Matters Here
Don’t just go through the motions. Be conscious, go slow, and be deliberate with each motion. Focus on feeling the muscle contraction. It can even be helpful to visualize the joint motion.
This consciousness and deliberateness has far reaching effects. When we do we’re not only affecting changes on a tissue level, but also on a neurological level. Specifically with respect to control and coordination of joint movement, and even with respect to cortical maps and body representations in the brain.
Programming
As far as programming, the typical prescription is going to be to perform each of these movements for 10 slow, deliberate repetitions. At we’re typically going to repeat this 2x/day, at least initially.
As each patient gets better and ROM and control improves, we will often add in additional patient specific strength or flexibility exercises. When we do this we will often reduce the frequency to be done once a day.